It was my friend, Áine's birthday last week and I decided to make her something special. She mentioned to me nearly a year ago that she loved Rainbow Cakes. This was before I started my blog and she asked me would I ever make her a rainbow cake? Challenge accepted!! What better time to try than for her birthday!! I had never made a rainbow cake before but I was very much looking forward to trying it. Off I went to the wonderful world of the internet. I researched blogs and YouTube tutorials.. finding out what sponge recipe best suited it, what food colouring to use, what size cake tins to use? I found a lot of great tips from a blogger I love Kerry Cooks. It was here I found a great tip to use tin foil flan cases from wilkos to bake the 6 layers of sponge. They were 6" foil cases and they worked out perfectly. Not only did I not have 6 cake tins the same size but I also hate washing up so the idea of just throwing these out after use really appealed to me!!

(Image- www.wilko.com)
I forgot to mention that I was against the clock baking this cake. You can by all means bake 2/3 layers at a time if you have the time but unfortunately I had to get all layers in the oven at the same time and cooled within a short time span. You see, we were having a surprise party for Áine on a Friday night so we had to come up with an excuse to get her out of the house for a couple of hours on the Thursday night (she's also my flatmate). We managed this with quite a few lies and I'd like to take this chance to thank everyone involved and sorry again Áine! So that is why I had to bake them all in one go.. which might I add was a bit stressful but worth it in the end!!

So back to the cake.. When it comes to the food colouring it is very important to use a good quality GEL food colouring. I emphasise the use of a gel food colouring because with a rainbow cake you need good vibrant colours. Liquid food colourings just don't give a strong enough colour and they also water down your batter when you add too much and believe me you don't want to skimp on the food colouring!! I used Squires Kitchen QFC Gel Food Colours that I bought from my local catering store. You can buy these online or I would also recommend Wilton Gel Food Colours available online. I used 5 colours* to achieve my ideal cake colours.. Red, Yellow, Green, Blue and Purple. I mixed my red and yellow to make the Orange so I had 6 colours in total.

(Image- www.squires-shop.com)
For the sponge I used a Victoria Sponge recipe and filled and covered the cake with Cream Cheese Frosting (of course!). As I mentioned before this cake is quite time consuming but it is so worth the time and effort to see the look on everyone's face when the cake is cut into. I'd also like to take this chance to apologise for the lack of photographs of the making process. As I said, I was really against the clock and it just completely slipped my mind. If I do get the opportunity to bake this cake again I will update this post with more pictures! The below ingredients are for 6 x 6" cake tins. If you are having trouble adjusting the measurements to suit the number / size of cake tins you are using please don't hesitate to contact me either here or on any of the social media platforms I use and I'll try and help you out.

Ingredients
(sponge)
400g Caster Sugar
400g Butter (at room temp)
8 Eggs
400g Self Raising Flour (sifted)
2 tsp Baking Powder
2 tsp Vanilla Extract
Gel Food Colouring* (see above)
(frosting)
120g Butter (at room temp)
280g Cream Cheese Frosting (from fridge)
680g Icing Sugar
1+ 1/2 tsp Vanilla Extract
Prepare
Grease your cake tins** and preheat your oven to 170C.
Method
As I mentioned above I cooked 6 layers at once so I made one big batch of batter. I was using a free standing cake mixer with a paddle attachment. I began by beating my butter and sugar together on a medium speed until light and fluffy. I then added my eggs (beaten), flour, baking powder and vanilla extract and continued to mix on a low-medium speed until they were all well incorporated.
I then divided my cake batter evenly between 6 bowls. I did this by using an ice-cream scoop and counting equally between each bowl. I then coloured my batter accordingly and placed them into the prepared cake tins. Like I said before do not skimp on the food colouring and it's also important to note that the colour of the cakes do adjust when baked (become more vibrant) so remember this too. I used a pallet knife to smooth the batter out before placing in the oven and cooking for approximately 22-25 mins. Because I was using small cake tins I had to watch them carefully to ensure they didn't burn. If you are using bigger cake tins just adjust the cooking time accordingly. You will know your cakes are baked when a skewer or cocktail stick inserted in the middle comes out clean and the sides of the cake start coming away from the tin.
It is very hard to judge the colour of the cakes when they first come out of the oven so do not be deterred if the colour doesn't look great. I was SO disappointed (ask my flatmates) with the colour of mine but cakes do turn a golden brown colour when baked and did not reflect the colour waiting inside!!
.jpg)
Leave your cakes to cool completely before decorating. I left mine over night as I was decorating it the next day. I wrapped them in cling film and placed them in air tight containers over night. When I got home from work on Friday I went straight into my icing!! I started by placing my butter and HALF of my icing sugar into the mixer and mixing on a low speed to begin with. It is so important that your butter is softened for this. Once combined I added the remainder of my icing sugar and continued to mix on a medium speed. If you are using a hand held whisk or have a small mixer you can make this in 2 batches. Once the icing sugar is combined add in your cream cheese and vanilla extract and mix on a medium-high speed for at least 5 mins.
Now the assembly... This will be extremely difficult if you are working in a hot kitchen so do try to ensure you're working in a cool / dry environment. Begin by leveling your sponges. It will be very hard to stack your cake if your sponges have domes on top! Get a sharp serated knife and put the knife against the cake where you want to start cutting it and gently cutting into the cake turn it slowly and you will get an even level all the way around. Here is a great tutorial I found on YouTube by The Boy Who Bakes on how to level a cake.
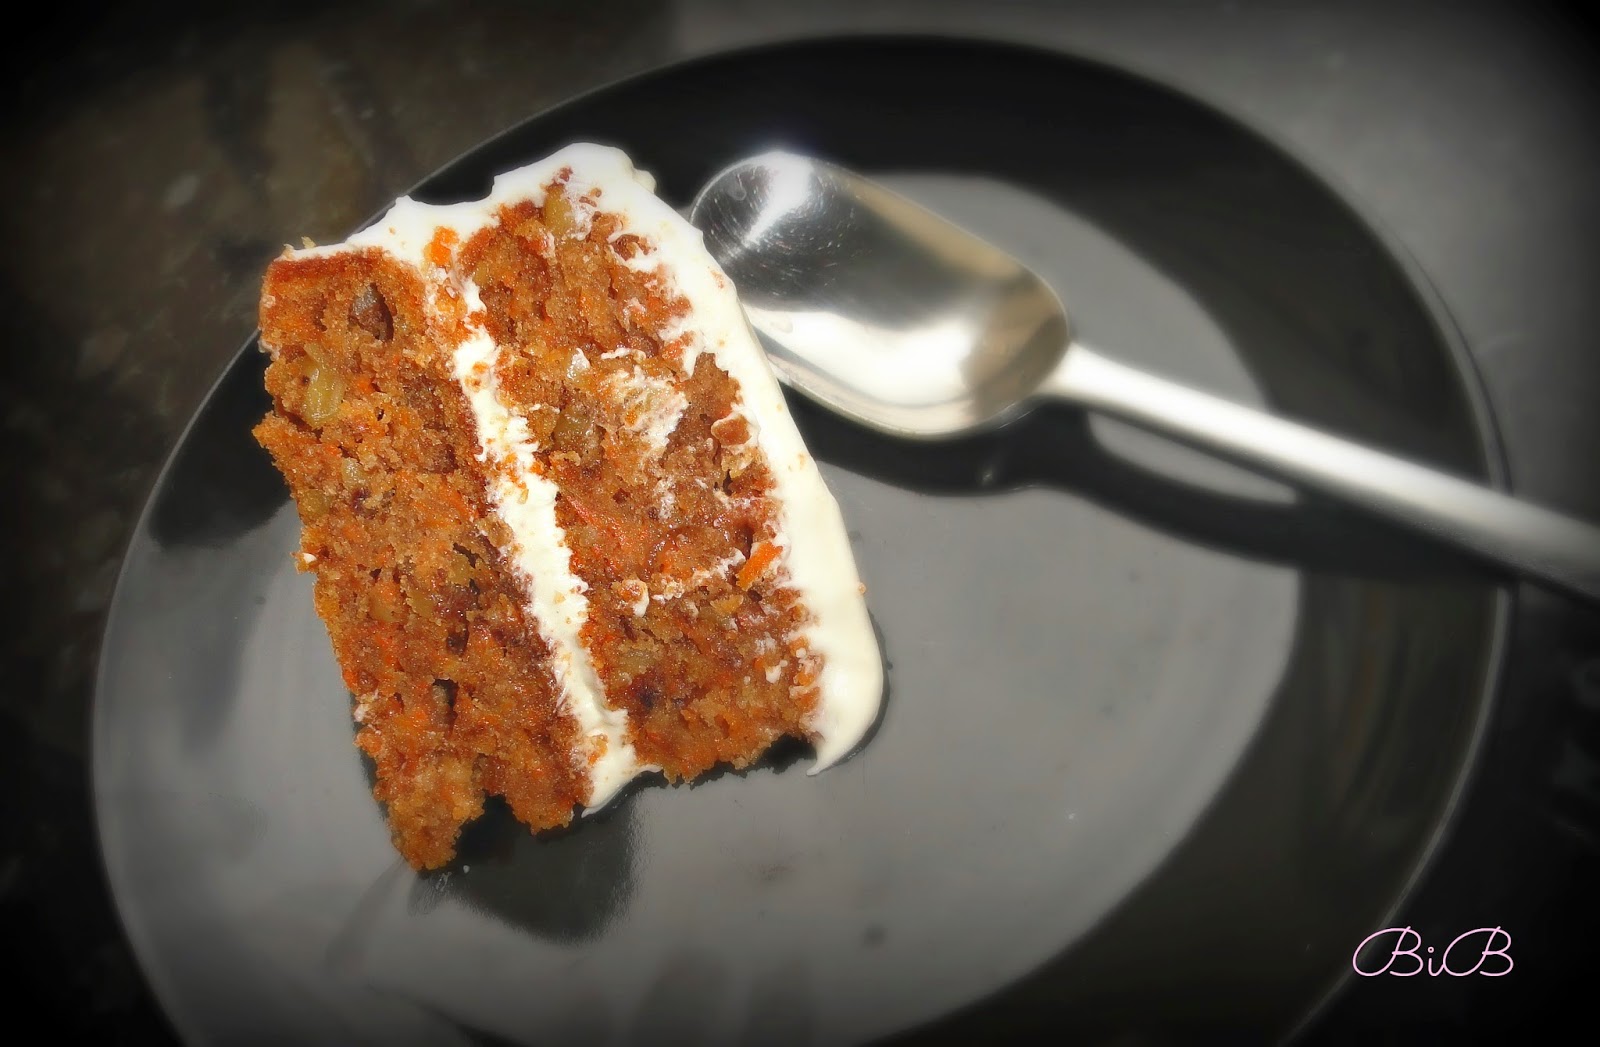
Once you have all your cakes level begin stacking them. Place a small smear of frosting on your cake board or plate and place your first layer of cake onto this (purple) and then spread a thin layer of frosting onto the top of this sponge. Then stack your next layer (blue) and again spread a thin later of frosting on top and repeat until you have your whole cake assembled (green, then yellow, then orange and red on top). Once stacked you can now crumb coat your cake.
Crumb coating is applying a thin layer of frosting to the top and sides of your cake to catch any crumbs that may lift off your cake when icing it. Again, I found a great tutorial on YouTube from The Boy Who Bakes here. This is where working in a cool / dry environment is so important because you want to keep your cake as straight as possible. If your frosting is too warm or soft your cake layers will start sliding and you will end up with a leaning tower of pisa cake!
Once you have your crumb coat applied place into the fridge for a minimum of 30 mins to one hour. When your cake comes out it should be cool to touch and not leave any finger impression. If it does place back in the fridge for another half hour. Also remember to put the remainder of your cream cheese frosting in the fridge while you're waiting so it won't go too soft but give it a nice stir with a spatula when you take it out again or it may be too hard to spread.

When your crumb coating has set you can now ice the rest of your cake. It is important to get a nice thick coating of frosting so you cannot see all the layers of cake underneath! You can frost it however you want.. using a piping bag, spatula or just spooning it on and spreading with a knife. I just roughly layered on the frosting evenly and then using my turntable and pallet knife I spun the cake while applying a very light pressure to the frosting and moving the pallet knife gently up the cake. I then decorated it with soft shimmer pearls I got from the Dr Oetker range in my local supermarket.
I know this is such a long blog post but please do not be deterred by this. I can honestly say I thought this cake was going to be a lot harder than it was. I know you're probably thinking "easy for her to say" but I would not put this recipe up on my blog if I didn't think each and everyone of you was capable of making this cake! My blog is called 'Breaking into Baking' after all!
If you want to bake this cake and are unsure or have any questions please don't hesitate to contact me on facebook, twitter or even instagram. You can even leave your comments down below and I will do my very best to answer all your questions!
Happy Baking,
O x

** If you are using regular cake tins grease and line the bottom of them with parchment paper. If using the disposable ones you only need to grease them.